
Contents
- Build list containing the SCOM Linux Agent versions
- Verify the versions for all prerequisite software
- Clearing the System Security Services Daemon (SSSD) Cache
- Tail the Logs
- Verify OpenSSL s_client
- Check Linux Ciphers
- Get MB / GB size of file
- WinRM Enumerate SCX Agent
- Enumerate OMI Information on UNIX/Linux Machine
- Certificate Troubleshooting
- Linux Agent Certificate Hostname Detection steps during initial Installation
- Purge SCX Agent Installation
- Linux Regular Expression (Regex)
- Firewalld Service
This post was last updated on September 27th, 2023
Build list containing the SCOM Linux Agent versions
The following url contains the versions of the SCX Agent: https://docs.microsoft.com/system-center/scom/release-build-versions
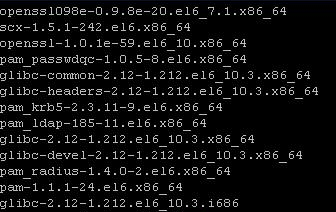
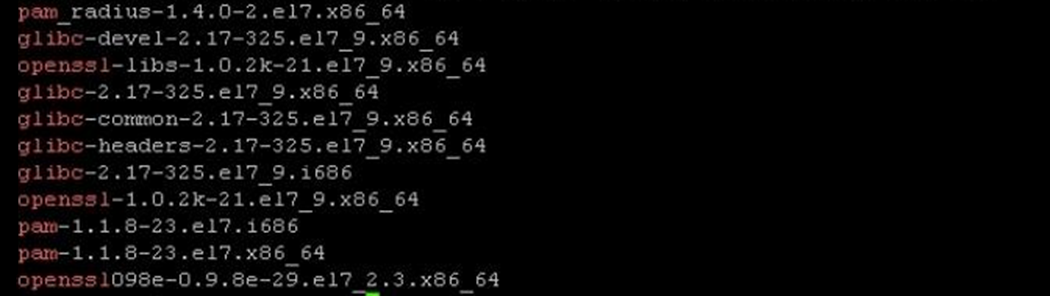
Verify the versions for all prerequisite software
You can run the following command on a monitored and not monitored server to compare the software installed, or verify with the official list https://docs.microsoft.com/system-center/scom/plan-supported-crossplat-os:
rpm -qa | egrep "^glibc|^openssl|^pam|^scx|^omi"
| Agent Version | Version | Management Group Version | Release Date |
|---|---|---|---|
| scx-1.5.1-242.e16.x86_64 | 7.5.1068.0 | SCOM 2012 R2 UR12 | 01/27/2017 |
Working Example:
Non-working Example:
Clearing the System Security Services Daemon (SSSD) Cache
The System Security Services Daemon (SSSD) provides access to identity and authentication providers. Basically rather than relying on locally configured authentication, SSSD is used to lookup its local cache. The entries within this cache may come from different remote identity providers, such as an LDAP directory, Kerberos, or Active Directory for example.
SSSD caches the results of users and credentials from these remote locations so that if the identity provider goes offline, the user credentials are still available and users can still login. This helps to improve performance and facilitates scalability with a single user that can login over many systems, rather than using local accounts everywhere.
The cached results can potentially be problematic if the stored records become stale and are no longer in sync with the identity provider, so it is important to know how to flush the SSSD cache to fix various problems and update the cache.
Note
It’s recommend to only clear the sssd cache if the identity provider servers performing the authentication within the domain are available, otherwise users will not be able to log in once the sssd cache has been flushed.
Stop SSSD Service
Service sssd stop;
Clear SSSD Cache
rm -rf /var/lib/sss/db/*;
Start SSSD Service
service sssd start
SSSD should now start up correctly with an empty cache, any user login will now first go directly to the defined identity provider for authentication, and then be cached locally afterwards.
Tail the Logs
Enable Verbose SCX Logs
Use the below command to enable verbose logging for the SCX Provider:
scxadmin -log-set all verbose
Enable Verbose logging for OMI Server
Use the below command to modify the omiserver.conf file. Change loglevel to one of the following valid options, verbose being highest: ERROR, WARNING, INFO, DEBUG, VERBOSE
sudo vim /etc/opt/omi/conf/omiserver.conf
If loglevel does not exist in the file you can add the following lines to the file and change the loglevel value
##
## loglevel -- set the loggiing options for OMI server
##   Valid options are: ERROR, WARNING, INFO, DEBUG, VERBOSE (debug build)
##   If commented out, then default value is: WARNING
##
loglevel = INFO
After saving and quitting vim, restart the service with below command for logging to be enabled
sudo /opt/omi/bin/service_control restart
Secure Log
You can run the following command to show current log data pertaining to authentication and authorization privileges:
tail -f /var/log/secure
Messages Log
You can run the following command to show all the global system messages, including the messages that are logged during system startup:
tail -f /var/log/messages
OMI
Server Log
tail -f /var/opt/omi/log/omiserver.log
Agent Log
tail -f /var/opt/microsoft/scx/log/omiagent.root.root.log
SCX
Agent Log
tail -f /var/opt/microsoft/scx/log/scx.log
Verify OpenSSL s_client
The OpenSSL s_client command is a helpful test client for troubleshooting remote SSL or TLS connections:
openssl s_client -connect server.domain.com:1270
openssl s_client -connect server.domain.com:1270 -tls1
openssl s_client -connect server.domain.com:1270 -ssl3
Check Linux Ciphers
openssl ciphers -V
Get MB / GB size of file
Run the following command to gather the MB / GB size of a file:
du -sh /var/opt/microsoft/scx/log/scx.log
WinRM Enumerate SCX Agent
From the Management Server(s) in the Unix/Linux Resource Pool, verify that the following command resolves correctly:
Basic Authentication
winrm enumerate http://schemas.microsoft.com/wbem/wscim/1/cim-schema/2/SCX_Agent?__cimnamespace=root/scx -username:<username> -password:<password> -r:https://<LINUXSERVERFQDN>:1270/wsman -auth:basic -skipCAcheck -skipCNcheck -skipRevocationcheck -encoding:utf-8
Kerberos Authentication
winrm e http://schemas.microsoft.com/wbem/wscim/1/cim-schema/2/SCX_Agent?__cimnamespace=root/scx -r:https://<LINUXSERVERFQDN>:1270 -u:<[email protected]> -p:<password> -auth:Kerberos -skipcacheck -skipcncheck -encoding:utf-8
Verify that you have enabled Kerberos via the Management Server Registry on each Management Server in the resource pool you are using to monitor the Unix/Linux agents: https://docs.microsoft.com/system-center/scom/manage-linux-kerberos-auth
Example 1
Issue
You may experience an error that contains the following when running the above Commands:
WSManFault
    Message = The server certificate on the destination computer (<LINUXSERVERFQDN>:1270) has the following errors:
Encountered an internal error in the SSL library.
Error number:  -2147012721 0x80072F8F
A security error occurred
or this error via the Discovery Wizard:
Agent verification failed. Error detail: The server certificate on the destination computer (<LINUXSERVERFQDN>:1270) has the following errors:
Encountered an internal error in the SSL library.
It is possible that:
   1. The destination certificate is signed by another certificate authority not trusted by the management server.
   2. The destination has an invalid certificate, e.g., its common name (CN) does not match the fully qualified domain name (FQDN) used for the connection.  The FQDN used for the connection is: <LINUXSERVERFQDN>.
   3. The servers in the resource pool have not been configured to trust certificates signed by other servers in the pool.
Resolution
- You could potentially import (Merge) the below known working ciphers by copying the text to a new file on your server called
example.reg, right click and Merge the file into your registry:Windows Registry Editor Version 5.00 [HKEY_LOCAL_MACHINE\SOFTWARE\Policies\Microsoft\Cryptography\Configuration\SSL\00010002] "Functions"="TLS_ECDHE_RSA_WITH_AES_256_GCM_SHA384,TLS_ECDHE_RSA_WITH_AES_128_GCM_SHA256,TLS_ECDHE_RSA_WITH_AES_256_CBC_SHA384_P256,TLS_ECDHE_RSA_WITH_AES_256_CBC_SHA384_P384,TLS_ECDHE_RSA_WITH_AES_256_CBC_SHA384_P521,TLS_ECDHE_RSA_WITH_AES_128_CBC_SHA256_P256,TLS_ECDHE_RSA_WITH_AES_128_CBC_SHA256_P384,TLS_ECDHE_RSA_WITH_AES_128_CBC_SHA256_P521,TLS_ECDHE_RSA_WITH_AES_256_CBC_SHA_P256,TLS_ECDHE_RSA_WITH_AES_256_CBC_SHA_P384,TLS_ECDHE_RSA_WITH_AES_256_CBC_SHA_P521,TLS_ECDHE_RSA_WITH_AES_128_CBC_SHA_P256,TLS_ECDHE_RSA_WITH_AES_128_CBC_SHA_P384,TLS_ECDHE_RSA_WITH_AES_128_CBC_SHA_P521,TLS_DHE_RSA_WITH_AES_256_GCM_SHA384,TLS_DHE_RSA_WITH_AES_128_GCM_SHA256,TLS_ECDHE_ECDSA_WITH_AES_256_GCM_SHA384_P384,TLS_ECDHE_ECDSA_WITH_AES_256_GCM_SHA384_P521,TLS_ECDHE_ECDSA_WITH_AES_128_GCM_SHA256_P256,TLS_ECDHE_ECDSA_WITH_AES_128_GCM_SHA256_P384,TLS_ECDHE_ECDSA_WITH_AES_128_GCM_SHA256_P521,TLS_ECDHE_ECDSA_WITH_AES_256_CBC_SHA384_P384,TLS_ECDHE_ECDSA_WITH_AES_256_CBC_SHA384_P521,TLS_ECDHE_ECDSA_WITH_AES_128_CBC_SHA256_P256,TLS_ECDHE_ECDSA_WITH_AES_128_CBC_SHA256_P384,TLS_ECDHE_ECDSA_WITH_AES_128_CBC_SHA256_P521,TLS_ECDHE_ECDSA_WITH_AES_256_CBC_SHA_P256,TLS_ECDHE_ECDSA_WITH_AES_256_CBC_SHA_P384,TLS_ECDHE_ECDSA_WITH_AES_256_CBC_SHA_P521,TLS_ECDHE_ECDSA_WITH_AES_128_CBC_SHA_P256,TLS_ECDHE_ECDSA_WITH_AES_128_CBC_SHA_P384,TLS_ECDHE_ECDSA_WITH_AES_128_CBC_SHA_P521,TLS_DHE_RSA_WITH_AES_256_CBC_SHA,TLS_DHE_RSA_WITH_AES_128_CBC_SHA,TLS_RSA_WITH_AES_256_GCM_SHA384,TLS_RSA_WITH_AES_128_GCM_SHA256,TLS_RSA_WITH_AES_256_CBC_SHA256,TLS_RSA_WITH_AES_128_CBC_SHA256" - An alternative to importing the above registry is to download and run IISCrypto and select Best Practices.
Be sure to verify if the Linux agent supports the same ciphers as the Management Server / Gateway. List of Ciphers Supported for Linux / Unix SCOM Agents: https://docs.microsoft.com/system-center/scom/manage-security-crossplat-config-sslcipher#cipher-suite-support-matrix
Enumerate OMI Information on UNIX/Linux Machine
Enumerate the SCX_OperatingSystem via omicli:
/opt/omi/bin/omicli ei root/scx SCX_OperatingSystem
Enumerate the SCX_ProcessorStatisticalInformation via omicli:
/opt/omi/bin/omicli ei root/scx SCX_ProcessorStatisticalInformation
Some OMI WMI Namespaces on the Linux Agent:
SCX_Agent
SCX_DiskDrive
SCX_DiskDriveStatisticalInformation
SCX_EthernetPortStatistics
SCX_FileSystem
SCX_FileSystemStatisticalInformation
SCX_IPProtocolEndpoint
SCX_LogFile
SCX_MemoryStatisticalInformation
SCX_OperatingSystem
SCX_ProcessorStatisticalInformation
SCX_StatisticalInformation
SCX_UnixProcess
SCX_UnixProcessStatisticalInformation
Certificate Troubleshooting
UNIX/Linux Certificate
Check Certificate
openssl x509 -in /etc/opt/omi/ssl/omi.pem -text -nooutGenerate Certificate with custom name
/opt/microsoft/scx/bin/tools/scxsslconfig -f -d contoso.com -h redhatGenerate Certificate
/opt/microsoft/scx/bin/tools/scxsslconfig -fRemove Old Certificate
rm /etc/opt/omi/ssl/omikey.pem --force
Configure the Xplat certificates (export/import) for each management server in the resource pool
The below steps show how to configure Xplat certificates easily for Management Servers with Powershell. You can automate this process for as many management servers as you need!
Windows Management Server Commands
Export Certificate On MS1 (Admin Powershell Prompt)
& "C:\Program Files\Microsoft System Center\Operations Manager\Server\scxcertconfig.exe" -export \\MS2\c$\MS1.cerExport Certificate On MS2 (Admin Powershell Prompt)
& "C:\Program Files\Microsoft System Center\Operations Manager\Server\scxcertconfig.exe" -export \\MS1\c$\MS2.cer
Import Certificate On MS1 (Admin Powershell Prompt)
& "C:\Program Files\Microsoft System Center\Operations Manager\Server\scxcertconfig.exe" -import \\MS1\c$\MS2.cerImport Certificate On MS2 (Admin Powershell Prompt)
& "C:\Program Files\Microsoft System Center\Operations Manager\Server\scxcertconfig.exe" -import \\MS2\c$\MS1.cer
Location for Certificates
SCOM 2012 Linux Agent:
/etc/opt/microsoft/scx/ssl/scx.pem
/etc/opt/microsoft/scx/ssl/scx-host-<HostName>.pem
SCOM 2016 Linux Agent and newer:
/etc/opt/omi/ssl/omi.pem
/etc/opt/omi/ssl/omi-host-<HostName>.pem
Linux Agent Certificate Hostname Detection steps during initial Installation
The following steps are what happens (from a high level) during initial installation of the Linux / Unix Agent to generate a Certificate for the Agent.
- Try
hostname -f(this will fail on some Linux systems) - Attempt to obtain the domain name from
/etc/resolve.conf - Attempt to obtain long hostname with
nslookupcommand
Purge SCX Agent Installation
On the Unix/Linux Machine locate the SCOM Linux Agent installation file, and run the following command to uninstall and purge the SCOM Linux Agent installation:
sh ./scx-<version>.<type>.<version>.<arch>.sh --purge --force
Linux Regular Expression (Regex)
The SCOM console uses .NET Regex and the SCX Agent uses POSIX Regex.
Firewalld Service
Check that the SCOM Linux Agent (omiengine) Port is listening, which would mean the SCX Linux Agent service is listening:
netstat -tulpn | grep -i 1270
-
To open port 1270 (any ip address) for System Center Operations Manager (SCOM) on a Red Hat server using Firewalld, you can execute the following commands:
-
Open the Port: To open port 1270, you would typically use the
--add-portoption to specify the port and the protocol (either TCP or UDP, depending on your requirement).sudo firewall-cmd --zone=public --add-port=1270/tcp --permanentThe
--zone=publicflag specifies that you’re modifying the public zone, but you could replacepublicwith the name of another zone if that’s more appropriate for your setup. The--permanentflag makes sure the rule survives reboots. -
Reload Firewalld: After adding the port, you’ll need to reload Firewalld to apply the changes:
sudo firewall-cmd --reload -
Check the Rules: To make sure the port has been opened, you can list the rules for the public zone as follows:
sudo firewall-cmd --zone=public --list-portsThis should display the ports that are open, and 1270 should be among them if the previous commands were successful.
These commands are based on the assumption that you are using the
firewall-cmdutility, which is the default frontend for Firewalld on Red Hat. -
-
To open port 1270 (specific ip address) for System Center Operations Manager (SCOM) on a Red Hat server using Firewalld, you can execute the following commands:
Here’s how you can open port 1270 for a specific IP address (e.g.,
192.168.1.10):sudo firewall-cmd --zone=public --add-rich-rule='rule family="ipv4" source address="192.168.1.10" port port=1270 protocol=tcp accept' --permanentThis adds a “rich rule” to the public zone, specifying that only traffic from the IP address
192.168.1.10is allowed to access port 1270 over TCP. Replace192.168.1.10with the specific IP address that needs access to your SCOM service on port 1270.After adding the rule, don’t forget to reload the firewall to apply the changes:
sudo firewall-cmd --reloadTo check if the rule has been successfully added, you can list all the rich rules for the public zone like so:
sudo firewall-cmd --zone=public --list-rich-rulesThis should show your newly added rule among the list.
Note: Be sure to check any security policies or guidelines in your organization before opening ports on a server.

Share on:
