Contents
In the below example we are assuming your machine is named IIS-2019.
Create a new file on your machine and name it:
IIS-2019-CertReq.inf
Edit the file to include something similar to the following (NOTE: Be aware Operations Manager only uses the first CN name in the Subject):
[NewRequest]
Subject="CN=IIS-2019.contoso.com,OU=Servers,O=Support Team,L=Charlotte,S=North Carolina,C=US"
Exportable=TRUE ; Private key is exportable - Required for Server Authentication
KeyLength=2048
KeySpec=1 ; Key Exchange – Required for encryption
KeyUsage=0xf0 ; Digital Signature, Key Encipherment
MachineKeySet=TRUE
ProviderName = "Microsoft RSA SChannel Cryptographic Provider"
ProviderType = 12
KeyAlgorithm = RSA

; Optionally include the Certificate Template
; [RequestAttributes]
; CertificateTemplate="SystemCenterOperationsManager"

[EnhancedKeyUsageExtension]
OID=1.3.6.1.5.5.7.3.1 ; Server Authentication
OID=1.3.6.1.5.5.7.3.2  ; Client Authentication
Open an Administrator Command Prompt and navigate to where you saved the above file.
Run the following:
Certreq -New -f IIS-2019-CertReq.inf IIS-2019-CertRequest.req
Note
The server where you run the above
Certreqcommand will be where the Certificate Private Key will be stored.
Upload the above (IIS-2019-CertRequest.req) file to your Certificate Authority.
…
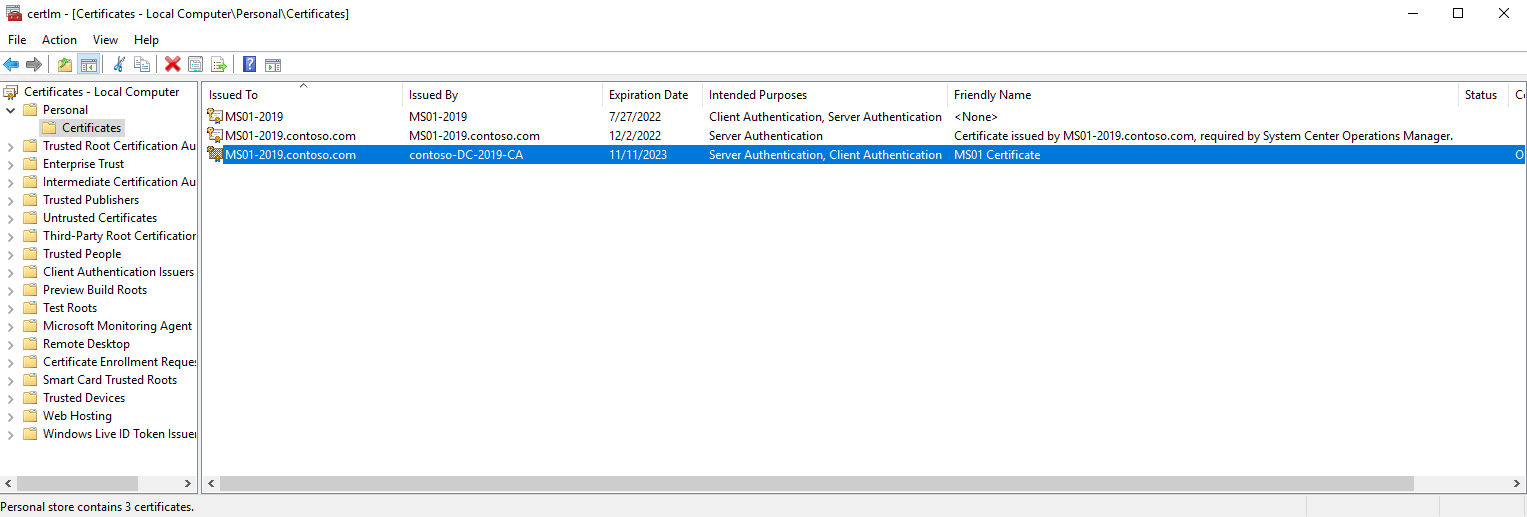
Once you receive back your signed certificate, import the Certificate into the Local Computer Personal Certificate Store:
certlm.msc
- Run this Powershell script to check the certificate you imported:
https://github.com/blakedrumm/SCOM-Scripts-and-SQL/blob/master/Powershell/Test-SCOMCertificate.ps1
Run it like this:.\Test-SCOMCertificate.ps1 -AllYou can also copy/paste the script to an Powershell ISE (Running as Administrator), you just need to edit line 770 to include the arguments you want to run.
On a side note. If you run the SCOM Certificate Checker script above and it shows an output that looks like this:

You may also notice that the Private Key for the Certificate is missing:
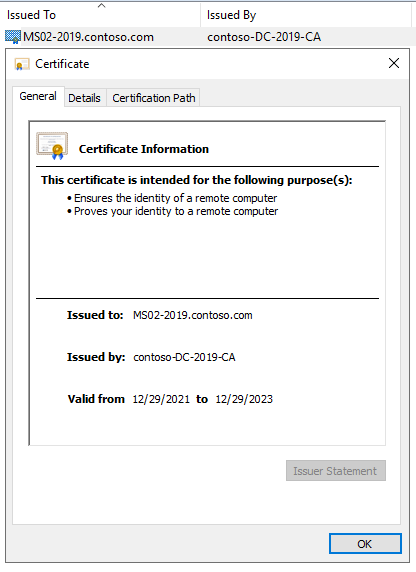
It is possible you may need to run the following command in an Administrator Command Prompt to restore the Keyspec and Private Key (replace the numbers & letters after my with the serial number of your Certificate):
certutil -repairstore my 1f00000008c694dac94bcfdc4a000000000008
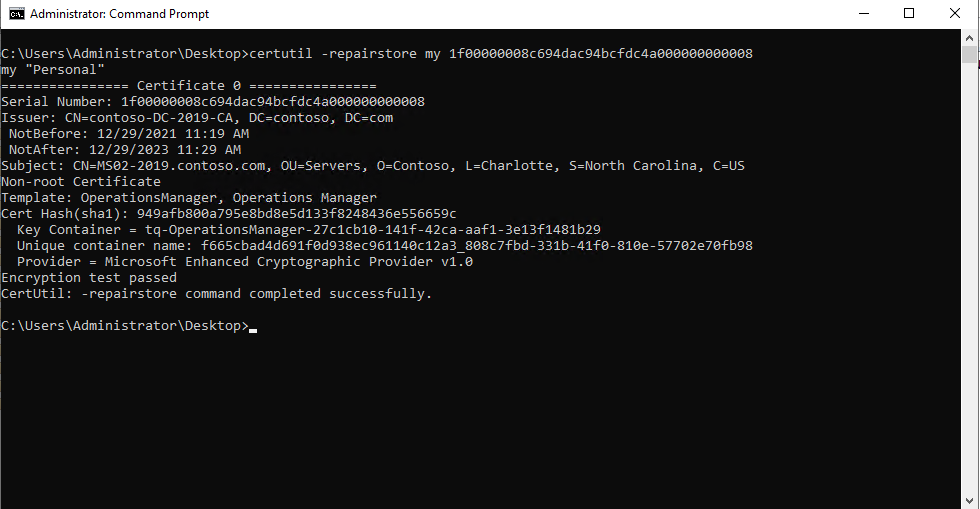
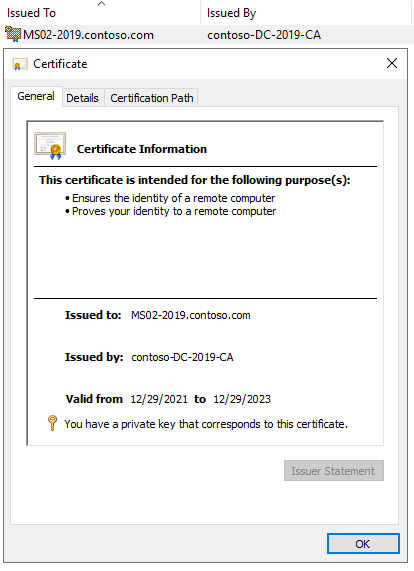
After you run the certutil command above, you will notice the Certificate is now showing a Private Key (notice the key icon):
You should now see this when you run the SCOM Certificate Checker Powershell Script:

Now you just need to import the Certificate with MOMCertImport (located on the SCOM Installation Media):
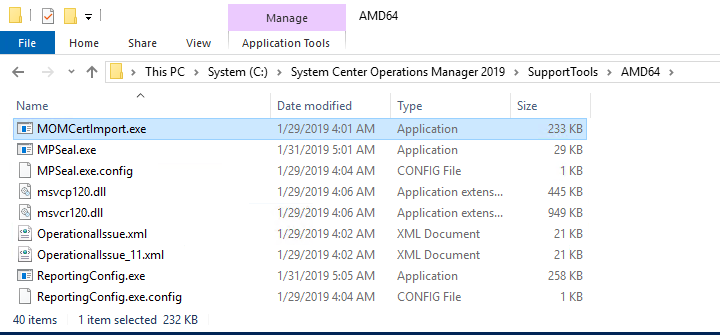
Right Click and Run the Program as Administrator, select the certificate you imported:
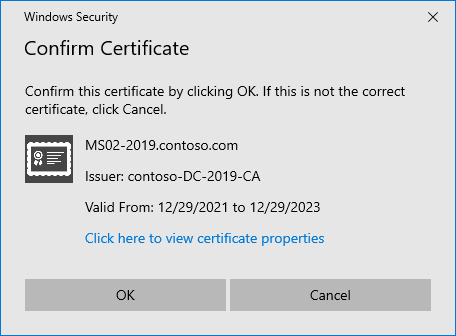
Lastly, you will need to restart the Microsoft Monitoring Agent (HealthService). You can do this via Powershell with this command:
Restart-Service HealthService
After restarting the Microsoft Monitoring Agent (HealthService). You will wait until you see the following Event ID in the Operations Manager Event Log (20053) confirming that the certificate has been loaded:
Log Name: Operations Manager
Source: OpsMgr Connector
Date: 2/28/2022 10:35:36 AM
Event ID: 20053
Task Category: None
Level: Information
Keywords: Classic
User: N/A
Computer: MS02-2019.contoso.com
Description:
The OpsMgr Connector has loaded the specified authentication certificate successfully.
Don’t forget the Management Server
The Management Server also needs to have a certificate requested for itself, and imported into the Personal Store in the Local Machine Certificates. You also need to run MOMCertImport.exe on the Management Server for the Management Server certificate. Otherwise the communication between the Management Server and the Agent or Gateway Server will not work via certificates.
Share on:
