Contents
- 💡 Introduction
- 💾 Download the Code
- 📬 What the Application Does
- 🏗️ High-Level Architecture
- ⚙️ Prerequisites
- 🔑 Configure the Connection String
- ▶️ Build the Application
- ▶️ Run the Application
- 🖥️ Interactive Mode
- 📧 Email Template and Message Content
- 🏷️ Custom Email Headers
- 🔎 Tracking and Correlation
- ⚙️ How It Works Internally (Deep Dive)
- 🧪 When This Tool Is Useful
- ⚠️ Common Issues When Testing ACS Email
- 🧠 Final Thoughts
💡 Introduction
Azure Communication Services (ACS) provides a powerful Email API that allows developers to send transactional and notification emails directly from applications without managing SMTP infrastructure.
While the official SDK documentation demonstrates the basic steps required to send an email, real-world implementations often require additional capabilities such as:
- Custom email headers
- Reply-to address handling
- HTML email templates
- Tracking identifiers for correlation
- Logging and troubleshooting visibility
- Automation-friendly execution behavior
To explore these scenarios, I built a small C# console application that demonstrates sending a formatted email using the ACS Email SDK while implementing several practical features that are commonly required in production environments.
This post explains how the application works, how to run it, and includes a deeper look at the internal logic used to send and track emails through ACS.
💾 Download the Code
You can download the full source code used in this article here:
🔗 Download the Email Quickstart Console Application
https://files.blakedrumm.com/EmailQuickstart-ACS.zip
After downloading, extract the archive and open the project folder in your preferred IDE such as Visual Studio or VS Code.
📬 What the Application Does
This console application sends a formatted HTML email using the Azure Communication Services Email SDK.
Key capabilities include:
- Sending HTML and plain-text email bodies
- Adding custom email headers
- Supporting reply-to addresses
- Generating a tracking identifier for correlation
- Polling the EmailSendOperation until completion
- Logging timestamps and send duration
- Supporting interactive and automated execution modes
Because of this functionality, the tool can be used as both:
- a developer testing utility
- a troubleshooting tool
- a validation tool for ACS email configuration
🏗️ High-Level Architecture
The application flow mirrors how the ACS Email service processes messages.
Console Application
        ↓
Azure.Communication.Email SDK
        ↓
Azure Communication Services
        ↓
Recipient Mail Server
The console application constructs an email message, submits it through the ACS Email SDK, and waits for the asynchronous send operation to complete.
⚙️ Prerequisites
Before running the application, ensure the following requirements are met.
1. Install .NET
The application requires the .NET SDK.
https://dotnet.microsoft.com/download
2. Create an Azure Communication Services Resource
In the Azure Portal:
- Create an Azure Communication Services resource
- Navigate to Keys
- Copy the connection string
Example format:
endpoint=https://<resource>.communication.azure.com/;accesskey=<key>
3. Configure ACS Email
Your ACS resource must have:
- An email domain configured
- A verified sender address
Without this configuration, email sends will fail.
4. Install the Required SDK
The project references the ACS Email SDK.
If you are creating a new project manually, install it using:
dotnet add package Azure.Communication.Email
🔑 Configure the Connection String
The application reads the ACS connection string from an environment variable.
Environment variable name:
COMMUNICATION_SERVICES_CONNECTION_STRING
Windows (Command Prompt)
setx COMMUNICATION_SERVICES_CONNECTION_STRING "endpoint=https://<resource>.communication.azure.com/;accesskey=<key>"
PowerShell
$env:COMMUNICATION_SERVICES_CONNECTION_STRING="endpoint=https://<resource>.communication.azure.com/;accesskey=<key>"
When the application starts, it validates that this variable exists before attempting to send an email.
▶️ Build the Application
Navigate to the project directory and run:
dotnet build
▶️ Run the Application
You can run the application using:
dotnet run
Or execute the compiled binary:
EmailQuickstart-WithCustomHeaders.exe
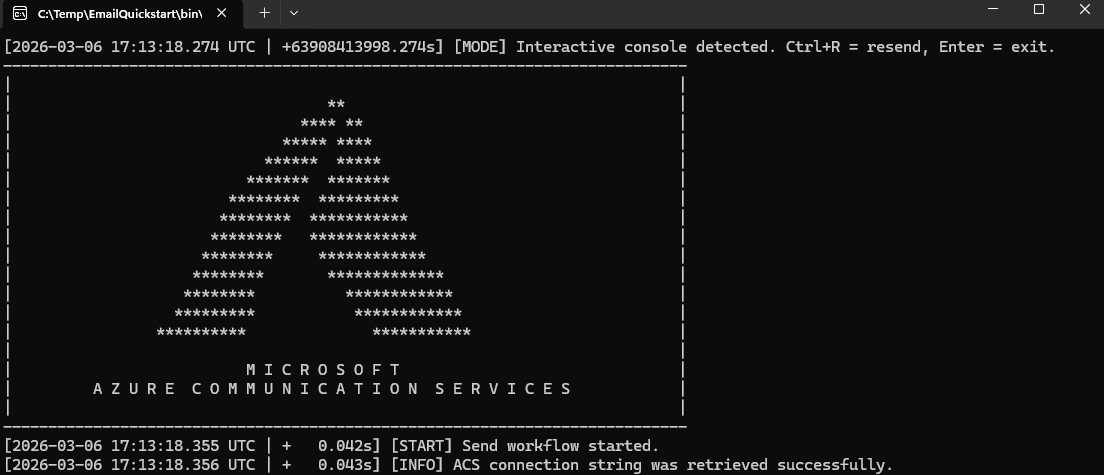
When executed, the application sends a test email and logs progress in the console.
🖥️ Interactive Mode
If the application detects it is running in a terminal session, it enters interactive mode.
Available commands:
Ctrl + R  → resend email
Enter     → exit application
This allows rapid testing without restarting the program.
If the application runs in non-interactive mode, it sends a single email and exits automatically.
📧 Email Template and Message Content
The application constructs both:
- an HTML message body
- a plain-text fallback body
The HTML template includes common elements used in production email layouts:
- Responsive layout
- Preheader text
- Call-to-action button
- Tracking identifier
- Optional “view in browser” link
The template contains placeholder tokens that are dynamically replaced before sending.
Examples include:
##TRACKING_ID##
##VIEW_IN_BROWSER_URL##
##REPLY_TO_EMAILS##
🏷️ Custom Email Headers
The project demonstrates the use of custom email headers to include metadata with each email.
Examples include:
Importance: normal
X-Mailer
X-Campaign
X-Environment
Custom headers can help with:
- campaign tracking
- environment identification
- message classification
🔎 Tracking and Correlation
Each email send generates a unique tracking identifier.
Guid.NewGuid()
This identifier can be inserted into:
- email headers
- message body
- console logs
This allows correlation between:
- application logs
- Azure Monitor diagnostics
- external email systems
⚙️ How It Works Internally (Deep Dive)
Step 1 — Initialize the Email Client
The application creates an EmailClient using the ACS connection string.
var emailClient = new EmailClient(connectionString);
Step 2 — Build the Email Message
An EmailMessage object is constructed containing:
- sender
- recipients
- subject
- HTML body
- text body
- reply-to addresses
- custom headers
Step 3 — Submit the Send Request
The EmailClient submits the message to Azure Communication Services.
ACS returns an EmailSendOperation, which represents the asynchronous send request.
Step 4 — Poll the Operation
Because email sends are asynchronous, the application polls the operation until completion.
During this process it logs:
- operation state
- elapsed time
- completion status
Step 5 — Log the Results
Structured logs are written to the console including timestamp and execution duration.
Example output:
[2026-01-16T20:03:14Z +2.31s] [INFO] Email send operation started.
🧪 When This Tool Is Useful
This console application is helpful for:
- validating ACS email configuration
- testing custom headers
- troubleshooting delivery failures
- verifying domain and sender configuration
- generating diagnostic logs
- validating HTML email templates
It effectively acts as a developer testing harness for Azure Communication Services Email.
⚠️ Common Issues When Testing ACS Email
401 Unauthorized
Usually caused by:
- incorrect connection string
- expired or regenerated access key
Sender Not Verified
The sender address must belong to a verified domain configured in ACS.
Email Never Arrives
Possible causes include:
- recipient spam filtering
- missing SPF or DKIM records
- invalid recipient address
- message size or attachment restrictions
🧠 Final Thoughts
Azure Communication Services makes it easy to send email programmatically, but real-world implementations often require more than minimal SDK examples.
This console application demonstrates several useful capabilities including:
- HTML email construction
- custom header support
- reply-to handling
- asynchronous operation polling
- structured logging
Tools like this make it easier to validate deployments, troubleshoot issues, and experiment with ACS email functionality before integrating it into larger systems.

Share on:
